https://vimeo.com/473045235 In this video, General Manager Capt. Andrew Mizell, Fly Tying Instructor Collin, and Casting…
STRIKE-ZONE HOW-TO: BALLYHOO RIGGING
In this video, Archie Gandionco, Strike-Zone Fishing Guide, explains how to make a Ballyhoo leader and properly rig a Ballyhoo. This includes the supplies you’ll need to properly rig a Ballyhoo, the steps to correctly rig them, and how to transport them for your fishing trip.
Key Topics for Rigging the Ballyhoo:
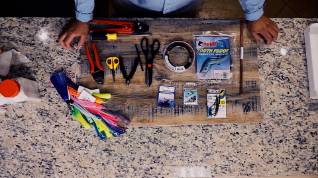
Step 1: Prepare Materials for Rigging (00:22)
- 60lb Diamond Fishing Fluorocarbon
- AFW Tooth Proof #12 Wire (For the pin on hook)
- Diamond Fishing Products 0.08 Double Sleeve Crimps
- 1.3 Billfisher Double Sleeve Crimp
- A pack of Bionic Bait thawed out Ballyhoo
- Owner 11/0 Long Shank Hook
- ⅜, ¼, ⅛ OZ Lead Egg Sinker (Chin-Weight)
- 12 Inch Heavy Duty Copper Rigging Wire
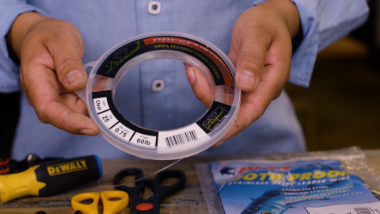
60lb Diamond Fishing Fluorocarbon 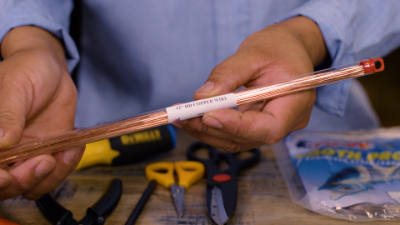
AFW Tooth Proof #12 Wire 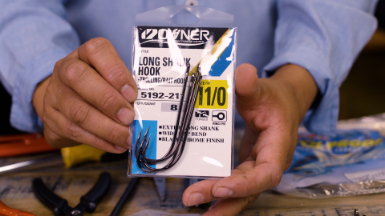
Owner 11/0 Long Shank Hook
Step 2: Prepare Tools for Rigging (02:07)
- Kitchen shears or braid snips
- A round shaft (Wooden Dowel or Arrow Shaft) for poking out the eyeballs
- Flesh cuts (For cutting tag ends on the leader)
- Cable Cutters (Cutting #12 Wire for pin rig)
- A Phillips head screwdriver to tie the Loop End
- Crimpers
- Max Bait Tray
- Bionic Bait Salt
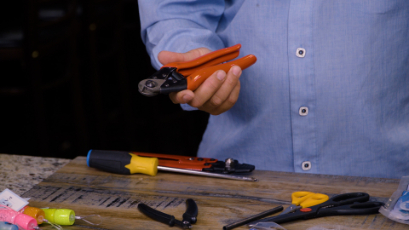
Crimpers 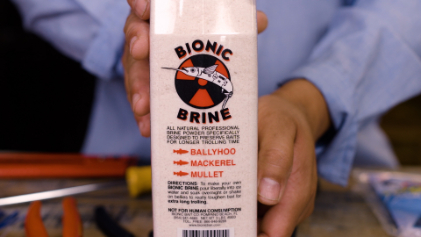
Bionic Brine
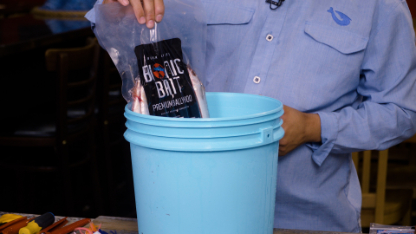
Step 3: Thaw Ballyhoo (03:37)
To properly thaw the Ballyhoo, Archie recommends putting the pack in a bucket of ice water for a few minutes, then they should be easier to work with while you prepare the leader.
Bionic Bait Ballyhoo 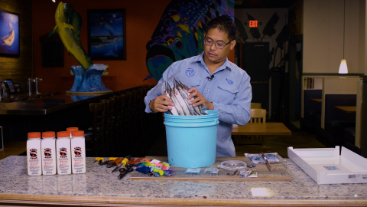
Bionic Bait Ballyhoo
Step 4: Making the Ballyhoo Leader (04:06)
First, cut the leader at an angle with your flesh cuts, this will help to insert the 60lb. Fluorocarbon into the 0.08 Double Sleeve Crimp. Pass it through the crimp, then pass it back through again and draw the loop down a ¼ inch. Grab your crimpers and mash down on the crimp. Now you are ready to attach a snap swivel.
If you do not have a crimp or crimpers on hand, the Perfection Loop is a great alternative to tying a loop on the end of your line. First, make a loop. Go around the loop and split the loop, then put the second loop in through the first loop. Now take your screwdriver and put it through the loop, pull down tight and cut the tag end off close.
Now the hook will be attached to the opposite end of the leader. Take the larger crimp, pass it through. Then feed the leader through the front side of your hook, the side with the point. Then go back through the crimp. Now, take the #12 wire and feed it into the back end of the crimp. This way it will go all the way through with a little bit of tag sticking in and it doesn’t push the leader out. Then, stand the crimp the crimper and crimp both ends of the crimp down. Push the #12 wire back, and cut about ¾ inch away from the crimp with the cable cutters. Then tie the copper wire onto the back of the hook eye about a ¼ inch, fold the tag end and wrap it around. Wrap around again, but this time put the tag end through the eye of the hook and underneath the loop just created from the second wrap. Now cinch down, and you are ready to rig your ballyhoo.
Making Leader 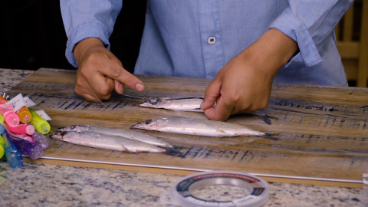
Inserting Leader
Step 5: Making a Chin-Weighted Ballyhoo Leader (08:14)
The only difference of rigging a chin-weighted ballyhoo leader is adding the sinker on the bottom end of the loop for a chin weight. First, pass the leader throughout the double sleeve crimp, then the chin weight. The chin weight size can vary depending on the size of the ballyhoo. Obviously, the smaller the ballyhoo uses smaller weight and the larger ballyhoo uses larger weight. Now pass the leader through the front end of the hook, and then the leader back through the crimp and draw the loop close. Now, take the #12 wire and insert it into the back end of the crimp, push it out then crimp everything down together. Bend the #12 wire back and cut close. Trim the remaining tag ends of the leader. Then tie the copper wire onto the back of the hook eye about a ¼ inch, fold the tag end and wrap it around. Wrap around again, but this time put the tag end through the eye of the hook and underneath the loop just created from the second wrap. Now cinch down, and you are ready to rig your ballyhoo.
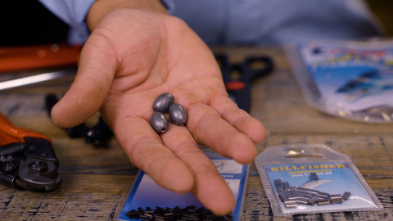
Egg sinkers 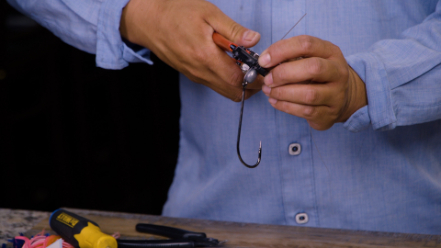
Crimping Rig 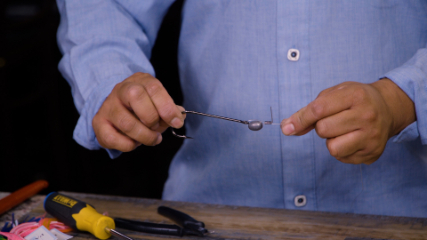
Chin-Weight Rig
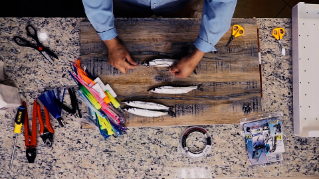
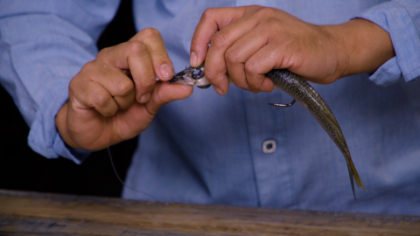
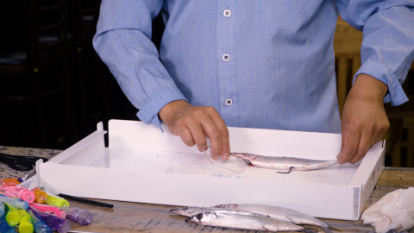
Step 6: Prepping Ballyhoo For Rigging (10:08)
Now the ballyhoo is thawed out, it’s time to rig them. Pull them out of the ice water and cut the pack open. When they first come out of the bag they are usually frozen and stiff, so first break off the beak. Then, take your kitchen shears or braid snips and cut the pectoral fins off. Many times the pectoral fins are frozen forward, which can cause the bait to spin, to avoid this cut them off. Then, break the back by moving the bait as if it’s swimming. Separate the meat from the backbone by squeezing the upper body until you see the back pop up just a little bit, but don’t squeeze too hard or you’ll crush the bait. Now squeeze the poop out, roll the bait to the backside, pinch the gills and just roll down to the back end of the bait to remove the poop. Then, poke the eyeball out with the round shaft for easier rigging. An extra step is to scale the bait by putting your thumb on the bait and push up against the scales to remove them. The scales inhibit the action of the bait so removing them gives it more action. However, removing them also reduces the lifespan of how far or long you can troll them. When removing the scales be sure not to press too hard or the skin can tear.

Cutting Pectoral Fin 
Poking out eyeball 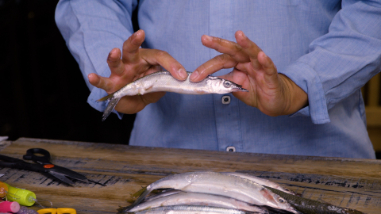
Separating back
Step 7: Rigging the Ballyhoo (13:36)
It is important to choose the correct sized ballyhoo for rigging. Some rigs can be made with different-sized hooks, so it is important to choose the right size ballyhoo for the appropriate sized materials. You don’t want to put a larger hook in smaller ballyhoo. The best way to get a plan of attack as far as what rig will work with which ballyhoo is to simply lay the rig over the ballyhoo. The pin that we made on the hook will insert through the lower jaw and out through the upper jaw, between the upper snout and the beginning of the eyeball. Now take note of where that falls, as well as where the hook will intersect through the belly of the ballyhoo so the bait won’t spin. Mark the point where the hook will intersect through the belly. Do this by making a small incision with the hook point.
Start by lifting the gill plate and feed the hook through it and back toward the small incision made. Make sure to curl the bait along with the curl of the hook when feeding the hook back. Come up out of the incision and push the hook downward to get in the correct position. Push the pin through the lower jaw and out through the upper jaw, coming out of the skull as straight or centered as possible. Now tuck the chin-weight right underneath the gill plate to hide it. Next, take the copper wire and lash the ballyhoo down. With the hook eye just behind the gill plate, go over the skull, back behind the other gill plate underneath the chin and through the eyeball socket, then wrap underneath and wrap behind the pin. Then, spiral forward and then back around until the tag end can be tucked into the eyeball socket. Push it down with the round shaft.
The best way to know if your bait is going to spin after it is prepped and rigged is to pull on the tail and the lead, just making a light tug. If the hook shank is curling the bait it will spin, but it moves without curling the bait it will not spin.

Inserting pin through the jaw 
Tucking Chin-Weight
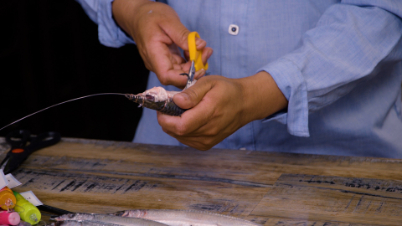
Step 8: Fixing an Improperly Rigged Ballyhoo (18:24)
One of the most common mistakes of rigging ballyhoo is improper hook placement, as far as where the hook comes out of the belly. A lot of times this mistake is made by choosing a smaller bait, or the hook was run too far back. If the bait is curling it may still be salvageable. Take your kitchen shears or braid snips, and cut ahead just enough to where there is no curl to allow the hook to ride freely. To toughen up the area that was cut, add brine to that area of the belly or add a stitch.
Cutting ahead incision 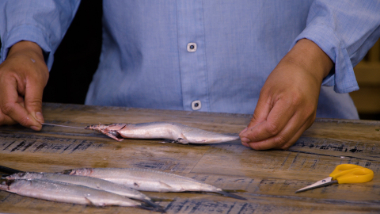
Pulling tight to see the curl
Step 9: Choosing Between Naked vs. Dressed Ballyhoo (20:00)
On an offshore day where you know you are going to be pulling some ballyhoo, it is important to have several rigged up either naked, dressed, chin-weighted, or not with a long shank hook. It is very effective to pull naked ballyhoo. However, adding a skirt will give the bait color, splash, and protect it as it is pulled through the spread.
To add a skirt, just simply pass the lead end through the backside of the lure and pull it through the hole. Now slide the skirt down the leader and dress it. Certain skirt heads give the bait different actions or swim a little different. The head of a skirt that splashes is very effective for Mahi. A bullet head pulled further back tends to attract more Tuna, and larger bullet heads Wahoo. Cup faces are great for billfish too.

Dressing ballyhoo 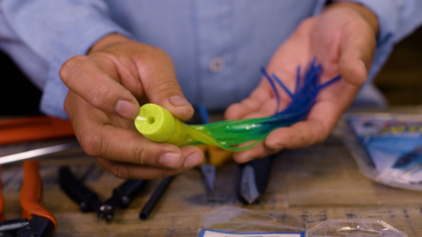
skirt 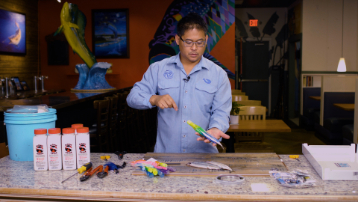
Skirted ballyhoo
Step 10: Storing Rigged Ballyhoo (21:40)
Once you have the ballyhoo rigged up it is ready to be stored for your fishing trip. Take the bait and coil the leader, only do two passes so there are not any tangles when you deploy the bait. Take the bait tray and salt the bottom with a nice layer then place the ballyhoo on top. Once you have a row of rigged ballyhoo lined up, salt the top layer generously. Continue to make rows of rigged ballyhoo and salting until there is the desired amount. Place the tray in a cooler over some ice, not directly on the ice, it should be elevated and dry but cool. These should last for a few hours over the course of a trip. Salting the bait down will also firm up the skin and allow you to pull it for a good amount of time until something hits it!
Salting ballyhoo 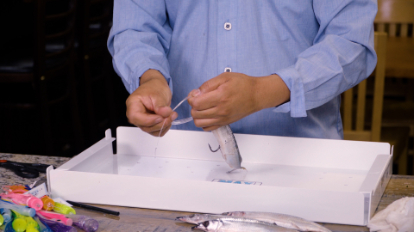
Storing ballyhoo
For all your fishing and hunting needs, feel free to visit us to get hooked up!
STRIKE-ZONE FISHING SHOP INFORMATION:
Hours:
Monday thru Friday 9am-7pm
Saturday 9am-5pm
Sunday 11am-4pm
Phone Number:
(904) 641-2433
Website & Online Store:
https://www.strike-zonefishing.com/
Related Posts